Creating the login page and replacing the existing one
In order to enable the Woffice's custom login page, please follow these steps:
if you do not have any Login page created yet, see the "Pages" page on your WordPress dashboard to check.
- Create a new "Login" page in WordPress, Pages > Add New, feel free to name it with something else.
- Once created, in the Template select field, choose "Login":
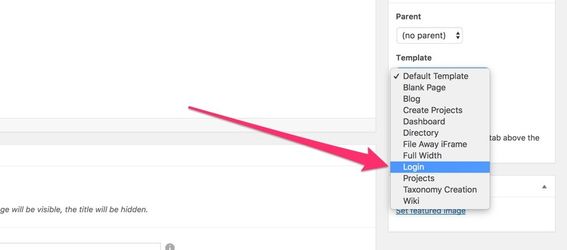
- Publish your page.
Once you have a Login page created:
- Go to the Appearance > Theme Settings > Login / Register tab
- Enable the "Custom login page" toggle
- In the Login Page option, type your login page name. It will come up after a few characters are typed. Select it.
- Make any design / content change from this tab
- Be sure to save at the end
That's all. Your WordPress login page should now redirects to the selected Login page.
| Warning |
|---|
Be sure that this login page is not assigned to any other functionality such as:
That is very important because otherwise your site will create endless loops and your site will stop being accessible. |
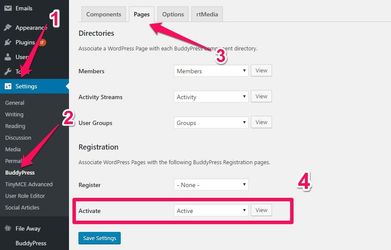
Email activation page
Create a new page, call it "Active" (or anything else you want) and leave the content blank. Then set it as the "Activate" BuddyPress page:
Remove the WordPress "admin bar" for unlogged users
By default a WordPress grey bar will be displayed on the top of every unlogged user's screen. This is a BuddyPress option that we highly recommend you to deactivate.
To do so, go to Settings > BuddyPress > Options > Toolbar, uncheck "Show the Toolbar for logged out users" > Save.